Why Your Sugar Cookies Spread in the Oven and How to Stop It
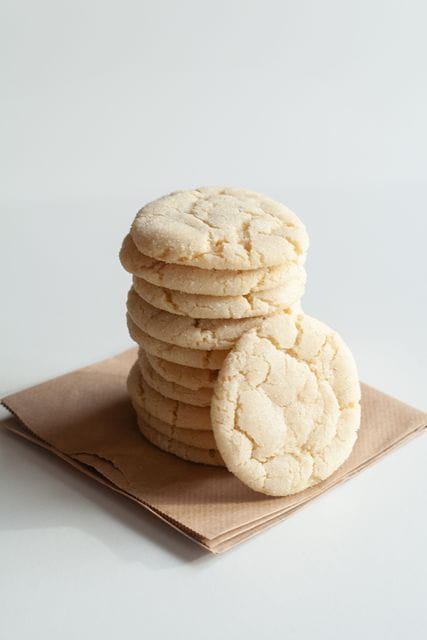
Summer baking comes with a sneaky problem: warm kitchens turn cookie dough soft before it ever hits the oven. I learned this the hard way one July when a batch of sugar cookies melted into one giant, sad puddle on the pan. Spreading cookies are almost never about luck; they are about butter temperature, flour measurement, and heat control. The good news is that every single cause has a simple fix you can master today. I want you to pull perfectly shaped, soft centered sugar cookies out of your oven, even in the middle of a heat wave. Let’s figure out exactly what went wrong and how to stop it for good.
Why Sugar Cookies Spread in the Oven
Sugar cookies spread because the fat in the dough melts faster than the structure can set. Butter begins to melt around 90°F, but the proteins and starches that hold a cookie’s shape do not set until the dough reaches roughly 140°F and beyond. That gap is the danger zone; if your dough enters the oven too warm, the butter liquefies and pulls the dough outward before the structure catches up. Warm summer kitchens shrink that margin even further. Once you understand this race between melting fat and setting structure, every fix makes perfect sense.
Butter Temperature Makes Sugar Cookies Spread in the Oven
Butter is the number one reason sugar cookies spread in the oven. Most recipes call for softened butter, which means about 65°F, cool to the touch but pliable enough to dent with a finger. In a July kitchen, butter left on the counter for an hour can easily hit 75°F or warmer. At that point it creams into a greasy slick instead of trapping air, and your dough is doomed before you even add flour.
Creaming technique matters just as much as starting temperature. Beating butter and sugar for too long, or on too high a speed, generates friction heat and warms the fat past its useful range. I cream on medium speed for two to three minutes, just until the mixture looks pale and slightly fluffy. Overcreaming also whips in excess air, which puffs cookies up in the oven and then collapses them into flat discs. Stop the mixer early; your cookies will thank you.
There is one more butter trap I see home bakers fall into constantly: melted butter as a shortcut. Softening butter in the microwave almost always creates hot spots and pockets of fully liquid fat. Liquid butter cannot hold structure, so the dough spreads the second it feels oven heat. If you forgot to soften your butter, cut it into small cubes and let it sit for twenty minutes instead. Patience here saves the entire batch.
Oven Temperature and Baking Sheets Make Sugar Cookies Spread
Your oven is probably lying to you, and that lie makes sugar cookies spread. Most home ovens run 15°F to 50°F off from their displayed temperature, and a too cool oven gives butter extra time to melt before the cookie sets. A five dollar oven thermometer is the cheapest insurance in baking. Check it every time you preheat; I promise the readout will surprise you at least once. Aim for a fully preheated oven, which usually means waiting ten minutes past the beep.
Baking sheets cause spreading more often than people realize. Dark colored pans absorb heat aggressively and superheat the bottom of the dough, melting the butter instantly. Greased pans are even worse; that slick layer of fat gives cookies a runway to slide outward. I always bake sugar cookies on light colored aluminum sheets lined with parchment paper. Parchment grips the dough just enough to hold its shape.
Warm pans sabotage second batches constantly. If you scoop fresh dough onto a sheet straight from the oven, the residual heat starts melting the butter immediately. Rotate between two cool baking sheets, or run the used pan under cold water and dry it thoroughly. Also give each cookie two inches of space, since crowded cookies trap steam and bake unevenly. Small habits like these separate frustrating bakes from consistent ones.
How to Stop Sugar Cookies From Spreading
Stopping spread comes down to keeping your dough cold and your measurements accurate. Cold dough buys the cookie time; the structure sets before the butter fully melts, locking in clean edges. Accurate flour gives the dough enough absorbency to hold the fat in place. Nail these two fundamentals and you can bake crisp edged sugar cookies in any season. Here is exactly how I do it in my own kitchen.
Chill Your Dough to Stop Sugar Cookies From Spreading
Chilling is the single most powerful way to stop sugar cookies from spreading. Refrigerate your dough for at least one hour, and go for two hours during hot summer months. Cold firms the butter back up, and it also gives the flour time to hydrate fully, which improves both texture and flavor. Many bakers notice deeper, almost toffee like notes in dough rested overnight. If you can plan ahead, a 24 hour chill is a genuine upgrade.
For cutout cookies, I roll the dough before chilling rather than after. Roll it between two sheets of parchment to a quarter inch thickness, then slide the whole flat sheet into the fridge. Cold dough in a thin, even slab chills faster and cuts cleaner than a dense ball. After cutting your shapes, return the pan to the fridge for another fifteen minutes before baking. That final chill is the secret to sharp, professional edges on decorated cookies.
The freezer is your emergency brake on a hot day. If your kitchen is above 78°F, pop shaped cookies into the freezer for ten minutes right before they go into the oven. Frozen edges hold their form while the interior bakes through gently. Never let cut cookies sit on the counter waiting their turn; keep the queue in the fridge. If you want to put these chilling techniques into practice, click here for my classic cutout sugar cookie recipe.

Measure Flour Correctly to Stop Sugar Cookies From Spreading
Too little flour makes dough loose, greasy, and prone to spreading. The scoop and sweep habit, where you dig the measuring cup straight into the bag, compacts flour and can still leave you short if your recipe assumed a lighter hand. A kitchen scale removes all guesswork; one cup of all purpose flour weighs about 120 grams. Weighing takes five seconds and instantly makes every recipe more reliable. It is the first tool I recommend to any home baker.
No scale yet? Use the spoon and level method instead. Fluff the flour in its container, spoon it gently into your measuring cup, and level the top with a straight edge. This gets you close to the correct weight without compacting. If your dough still feels sticky and slack after mixing, work in an extra tablespoon of flour at a time until it feels soft but not greasy. Trust your hands; dough should release cleanly from your fingertips.
Sugar and leavening deserve a quick check too. Excess sugar liquefies in the oven and pulls cookies outward, so measure it as carefully as flour. Old or overmeasured baking powder puffs cookies up dramatically, then lets them collapse flat. Replace leaveners every six months and level every teaspoon. Precision sounds fussy, but it is really just kindness to your future self.
Baking Better Sugar Cookies Every Time
Perfect sugar cookies are not a talent; they are a checklist. Cool butter, chilled dough, weighed flour, an honest oven, and cool pans will fix spreading in nearly every kitchen. Once these habits become automatic, you stop troubleshooting and start creating. Summer birthdays, bake sales, and July cookouts all deserve cookies with crisp edges and tender middles. Here is how I lock in success batch after batch.
Simple Habits for Baking Better Sugar Cookies
I keep an oven thermometer hanging from the center rack permanently. Every preheat gets verified before a single pan goes in. This one habit has saved me more batches than any other.
Bake one test cookie before committing the whole tray. A single cookie shows you in ten minutes exactly how the batch will behave. If it spreads, chill the dough longer or add a spoonful of flour. Adjusting early beats mourning a full pan later.
Pull cookies when the edges are set but the centers still look slightly underdone. Carryover heat finishes the middle on the pan. Let them rest on the baking sheet for five minutes before moving them. Looking for the perfect finishing touch? Click here for my easy royal icing recipe for decorating.
Troubleshooting Checklist for Baking Better Sugar Cookies
Cookies spread into puddles? Your butter or dough was too warm, so chill longer and check your kitchen temperature. Greasy, thin cookies point to undermeasured flour. Weigh your ingredients and try again.
Puffy cookies that collapse usually mean overcreamed butter or too much leavening. Cream for less time and level your baking powder carefully. Pale, doughy cookies signal an oven running cold. Verify the temperature and extend the bake by a minute or two.
Uneven browning means hot spots in your oven. Rotate the pan halfway through baking to even things out. Keep this checklist taped inside a cabinet door. Every failed batch becomes a lesson instead of a loss, and that mindset is what turns a home baker into a confident one.